Auto Website Deployment via Vercel Deploy Hooks
To create a Deploy Hook for your project, make sure your project is connected to a Git repository.
Once your project is connected, navigate to its Settings page and then select the Git menu item.
First go to your project Settings > Git

Go to the Deploy Hooks section and choose a name for your Deploy Hook and select the branch
that will be deployed when the generated URL is requested.

After submitting the form, you will see a URL that you can copy and use. A Deploy Hook trigger url looks like this,
https://api.vercel.com/v1/integrations/deploy/<token>
You have to replace:
<token>with your deploy trigger token.
Deploy Hooks will not be triggered if you have the github.enabled = false configuration present in a vercel.json file.
Add the Webhook in Apito
Finally, add a webhook in the Apito Console using the url that you have build. To create a webhook you have to go to Settings in Apito Console then Webhooks from the left
navigation bar and click Create a Webhook
You have to fill in:
NameName of the webhooksModelThe model that the webhook will reflect toOperationChoose from which action you would like to trigger the webhook forWebhook URLThe Gitlab Pipeline Trigger URL
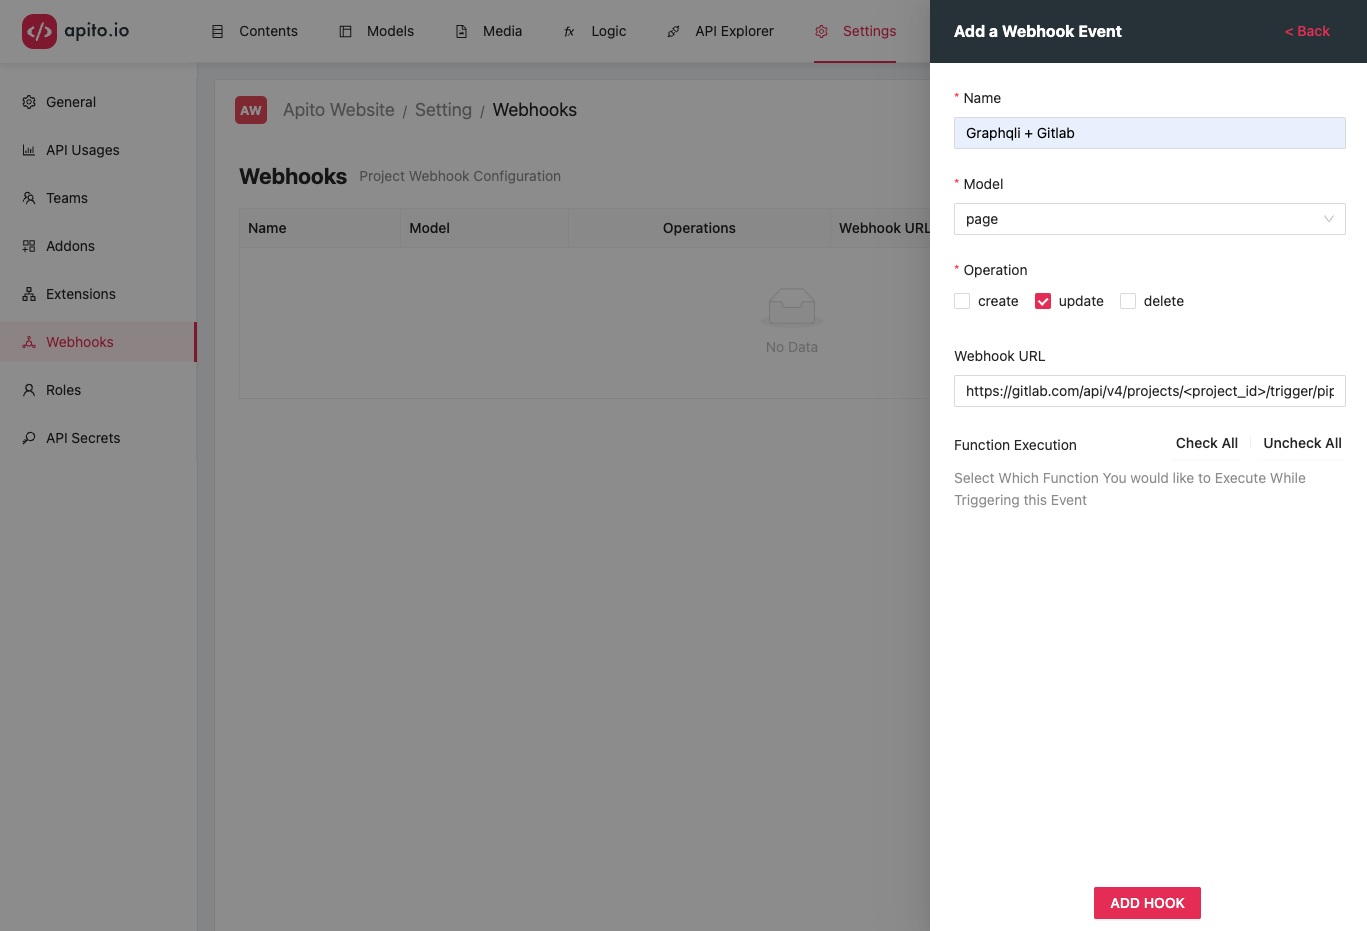
Click on the CREATE HOOK to create your trigger hook. Now each time your model updates, in this example page updates it will send a POST trigger to the URL with the page data
in the request body as json.